Starting work on your new SPA (Single Page Application) and need a solid and FREE authentication and access control mechanism? In that case, the Microsoft Entra service (formerly Azure Active Directory) might be an excellent solution. This post will discuss how to register a SPA in Microsoft Entra step by step, to secure it against unauthorized access and utilize the ability to assign roles to users within a Tenant. The following example is based on a tutorial I found on GitHub here: LINK
I assume that you already have your own Tenant (according to Microsoft’s Polish translations, it’s called „dzierżawa,” but let’s stick with the original names). If not, you can find out how to create one here: LINK
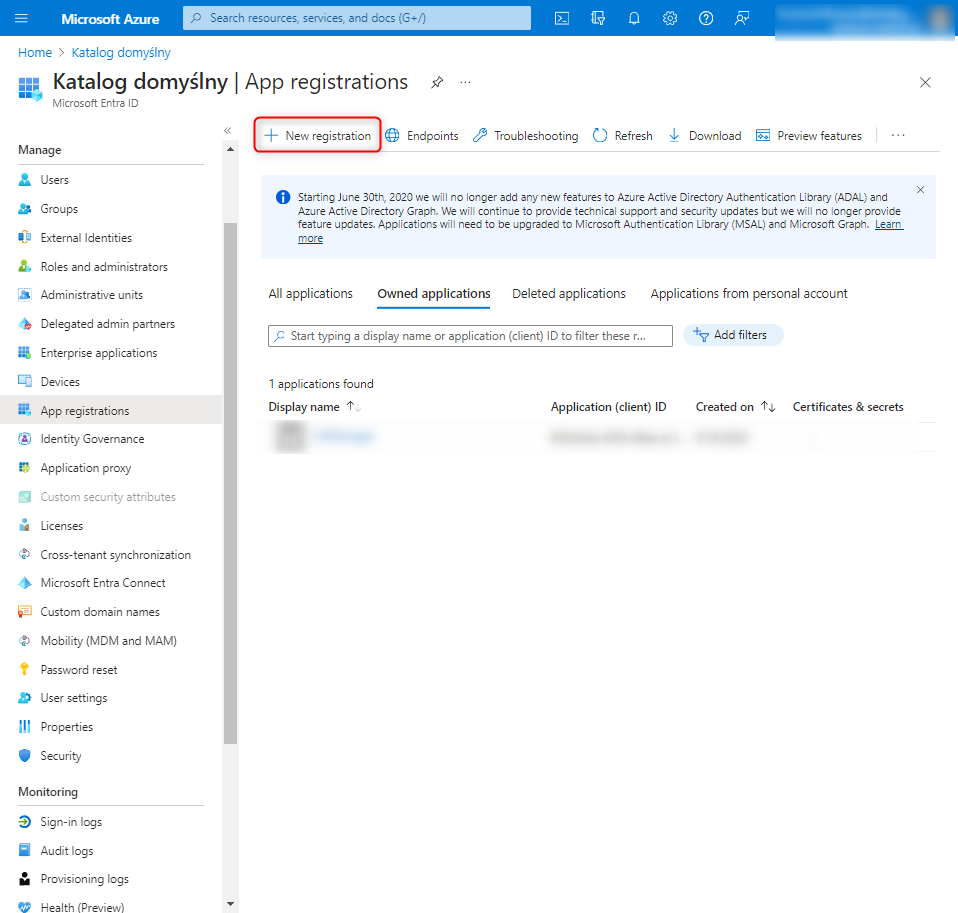
We proceed to configure our Tenant in Microsoft Entra, starting with creating a new App registration:
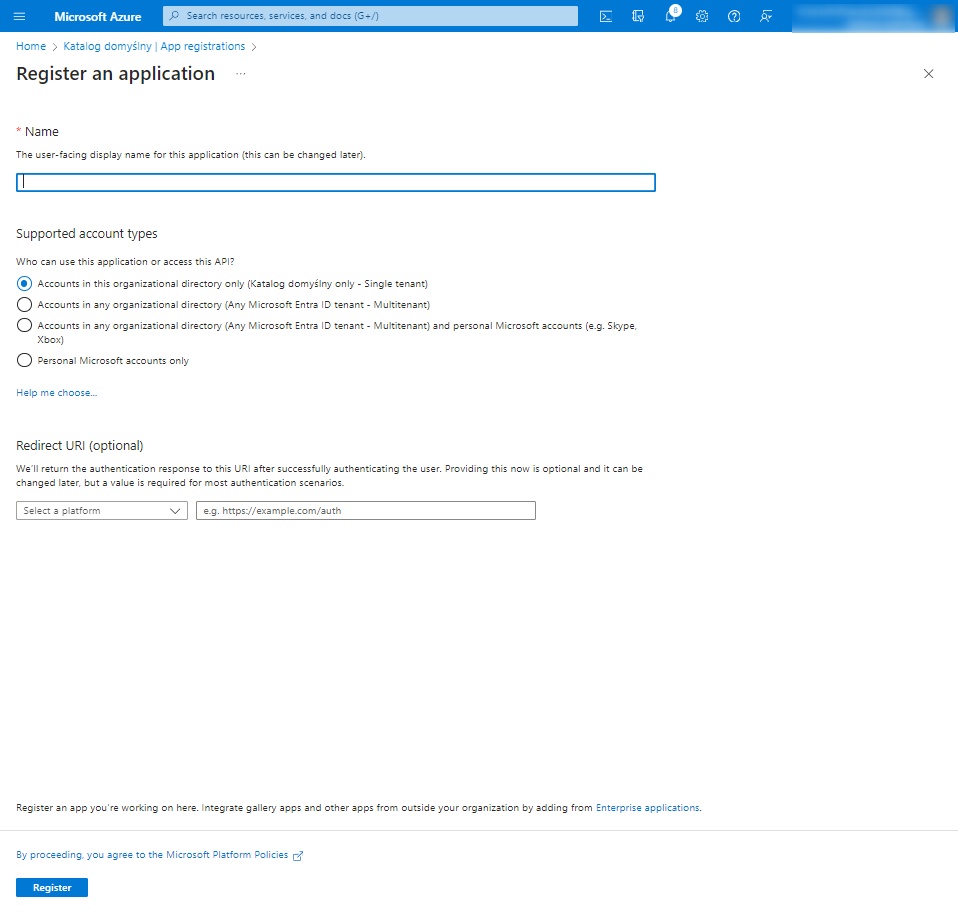
We assign the name: msal-react-spa (we do not change the names of the registrations or descriptions, as the sample application will not work later on).
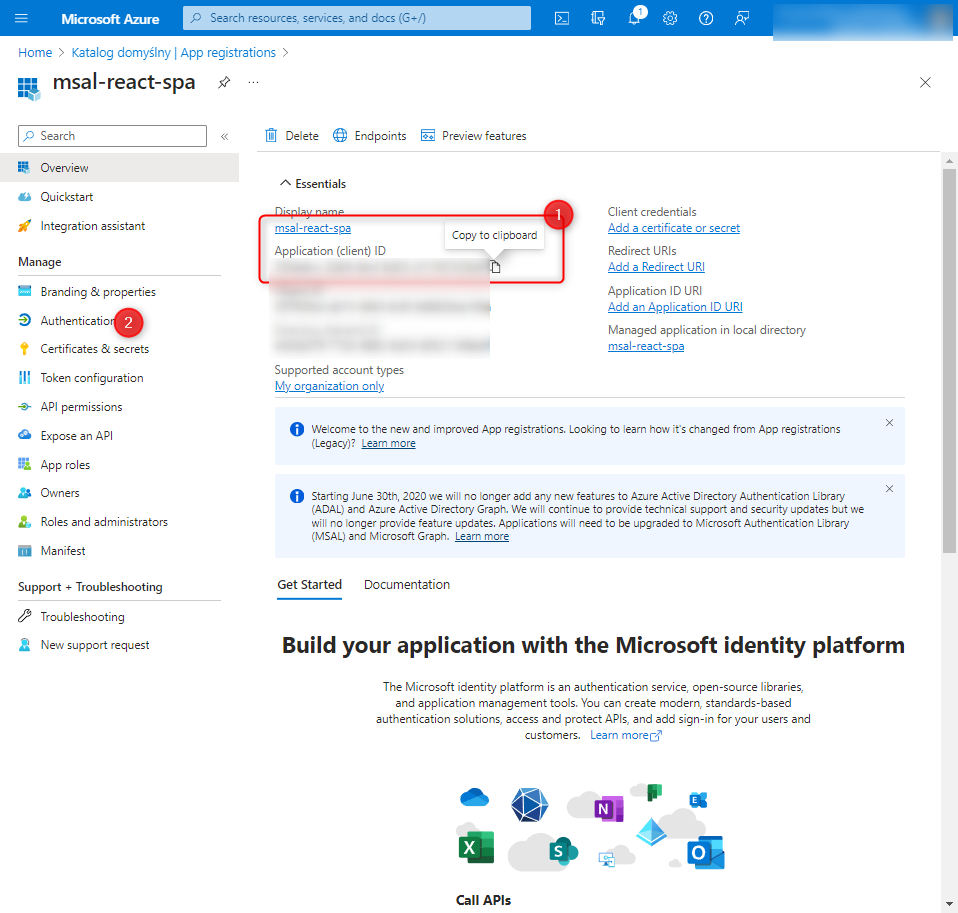
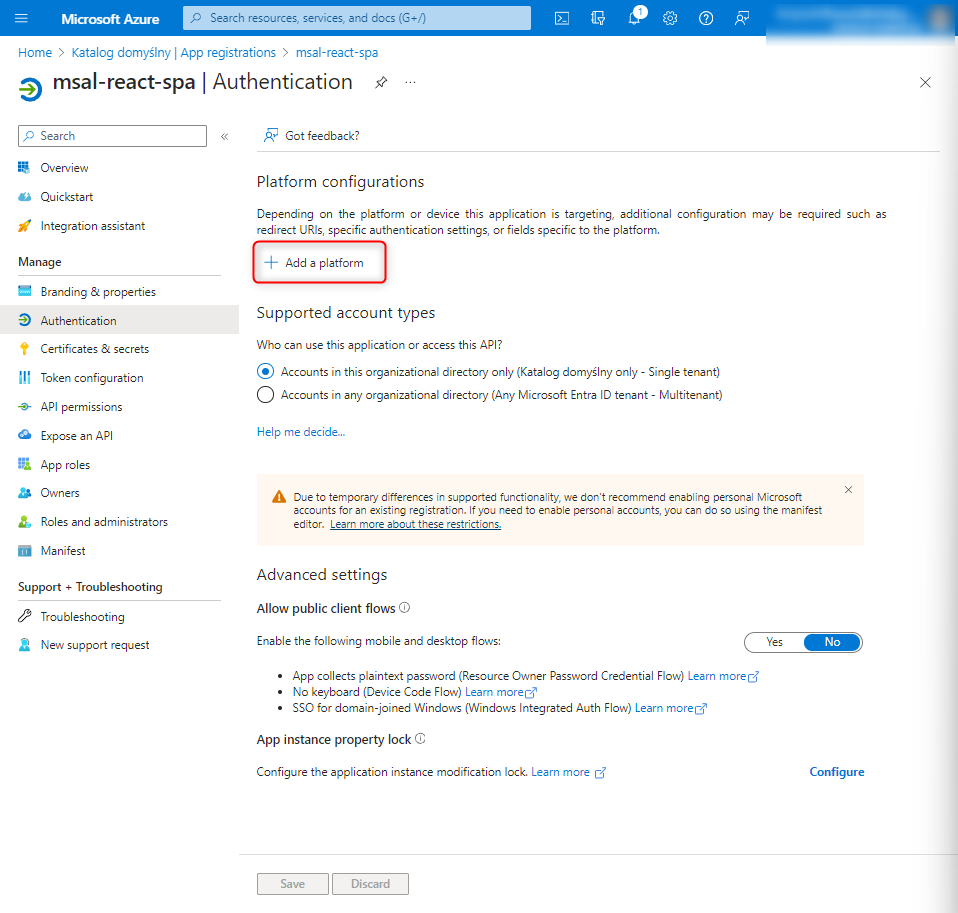
We move to the Authentication tab.
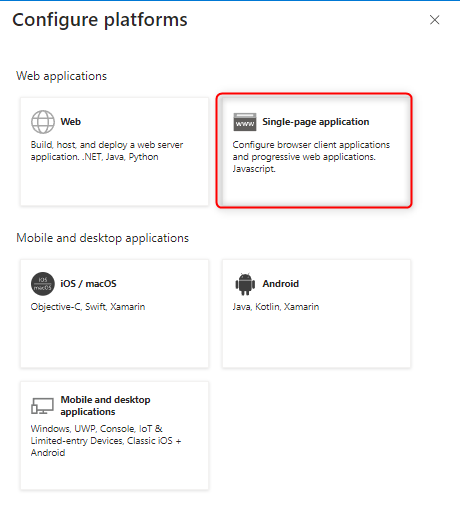
We add a configuration for the SPA platform (as shown in the pop-up window in the image below).
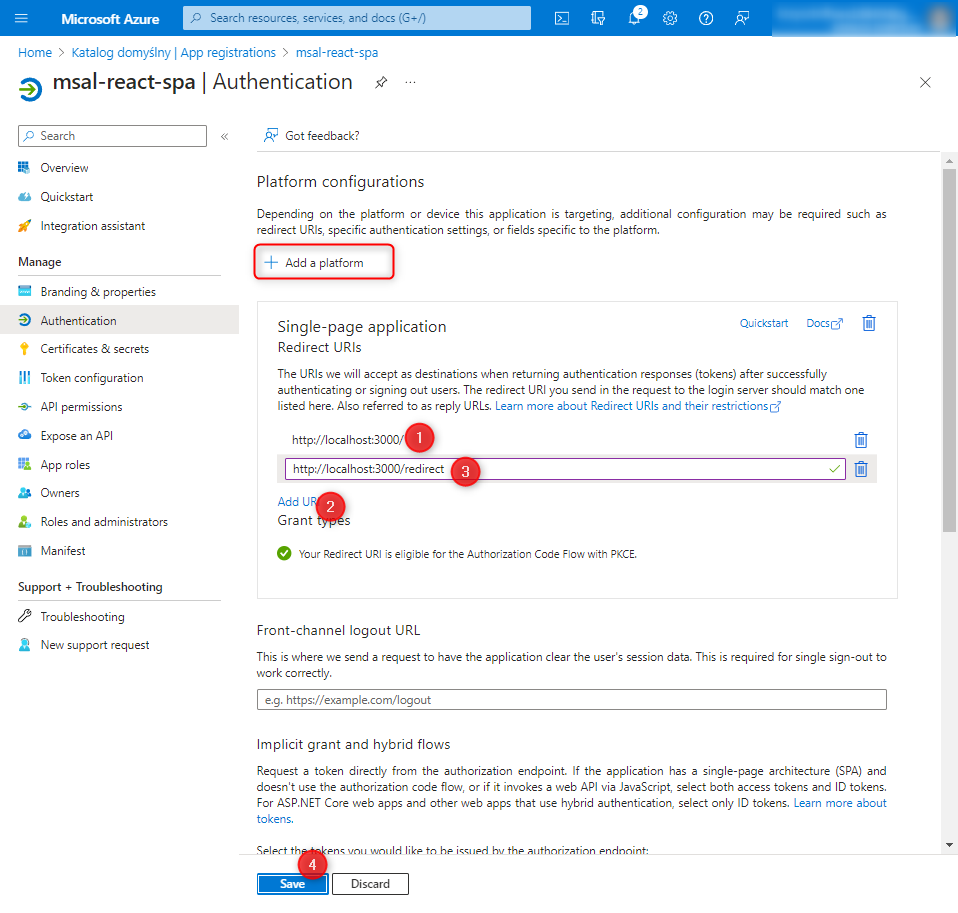
We fill in two redirect URIs:
http://localhost:3000/http://localhost:3000/redirect
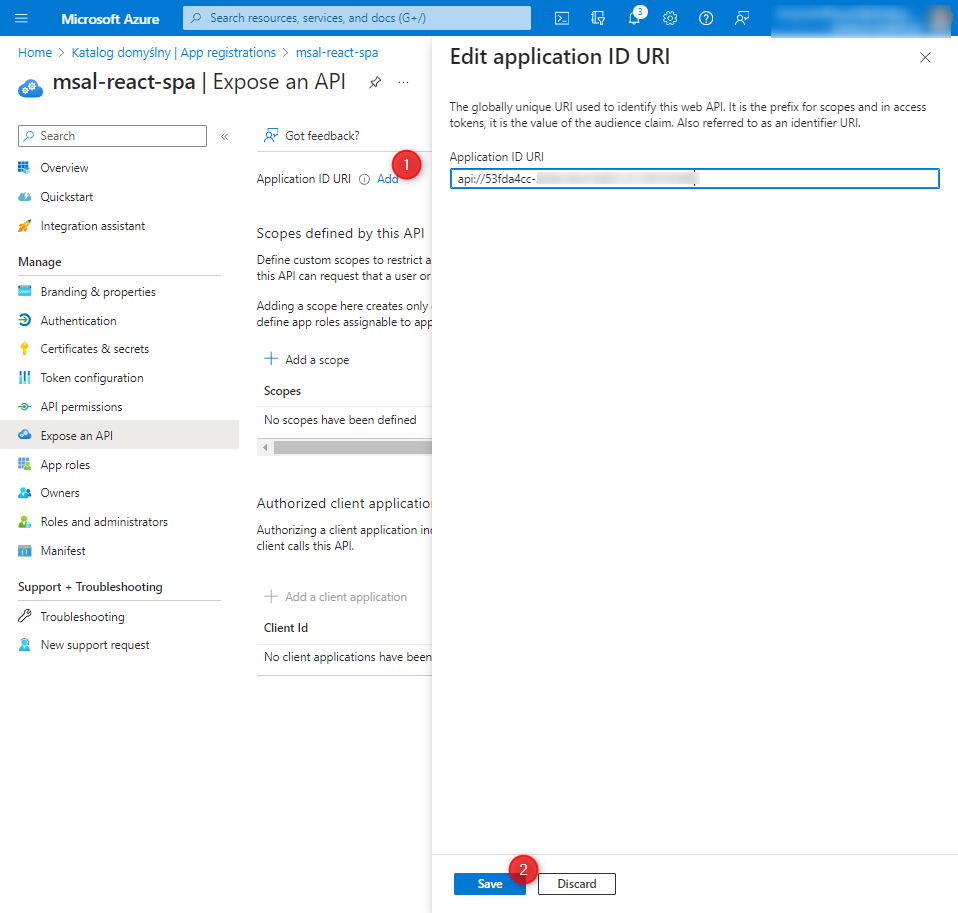
We go to the Expose an API tab and add an application ID URI (leaving the default setting).
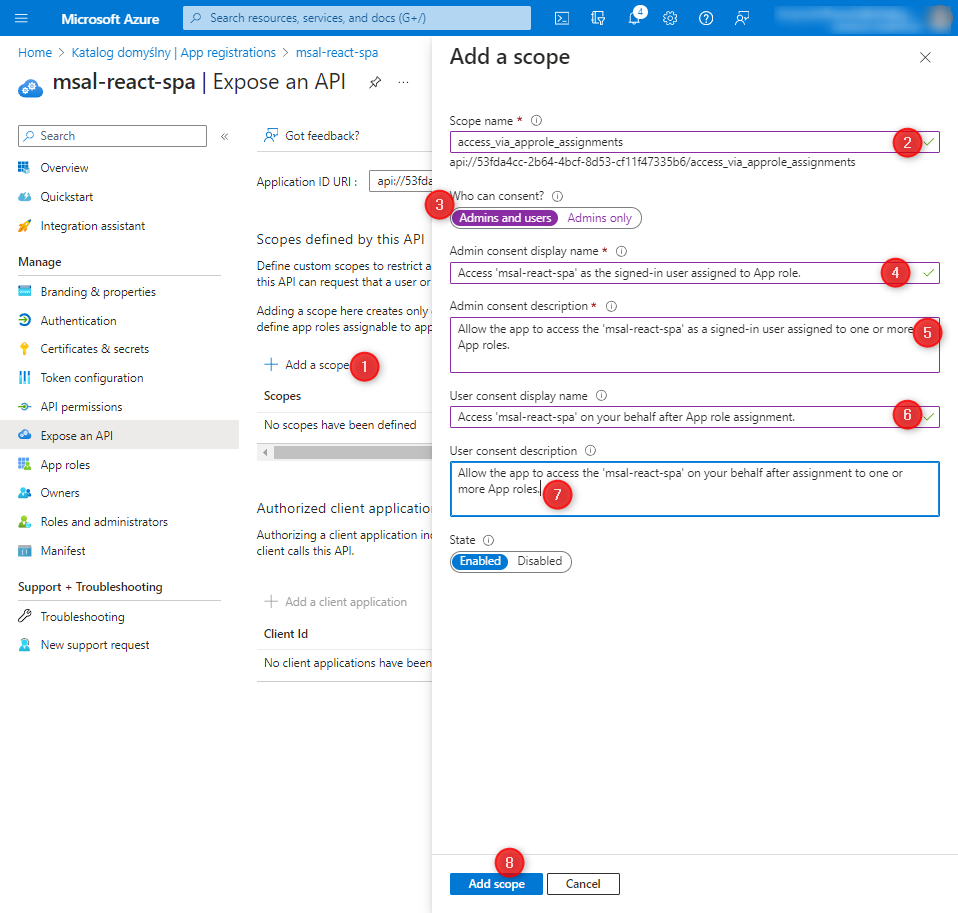
Now, we add a scope by filling in the necessary details:
access_via_approle_assignments
Access 'msal-react-spa’ as the signed-in user assigned to App role.
Allow the app to access the 'msal-react-spa’ as a signed-in user assigned to one or more App roles.
Access 'msal-react-spa’ on your behalf after App role assignment.
Allow the app to access the 'msal-react-spa’ on your behalf after assignment to one or more App roles.
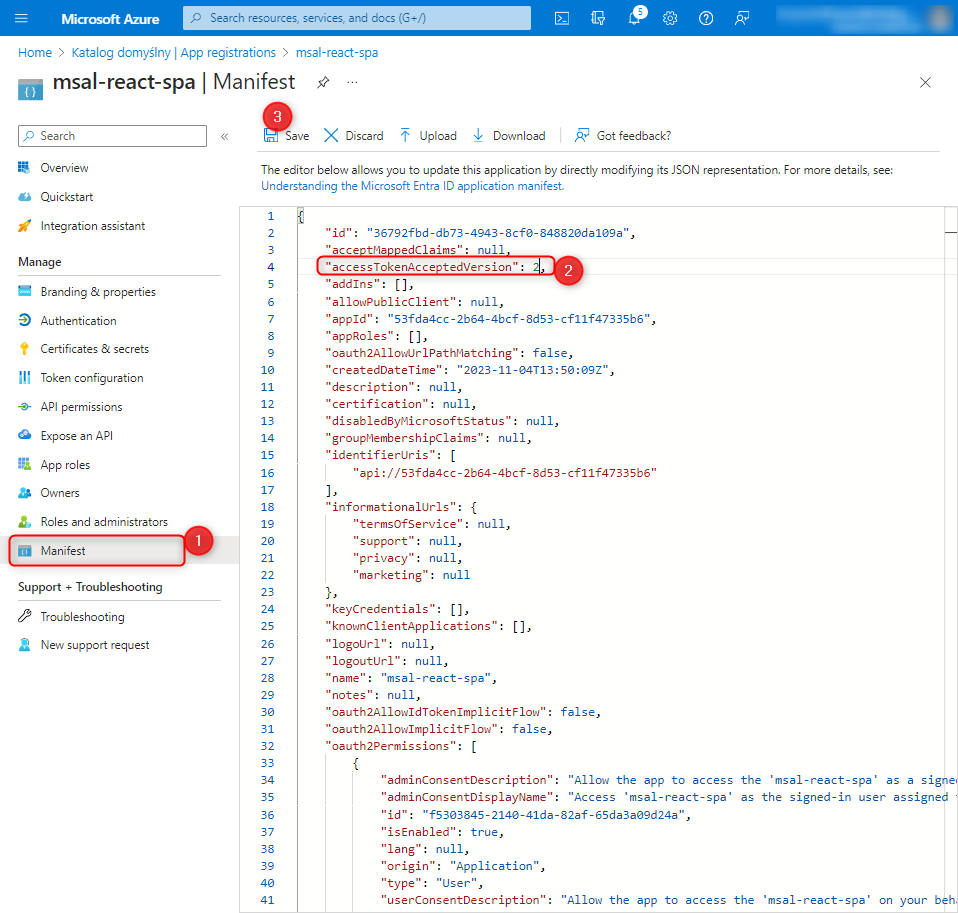
In the Manifest tab, we change the highlighted field from null to 2.
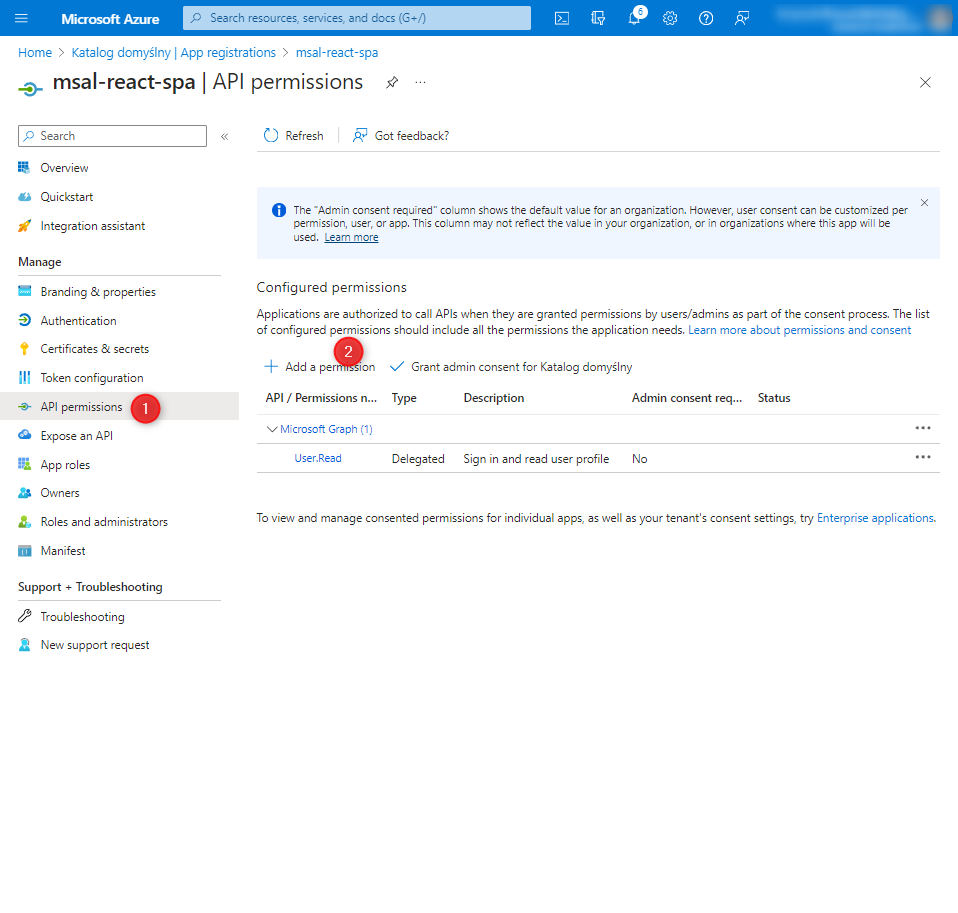
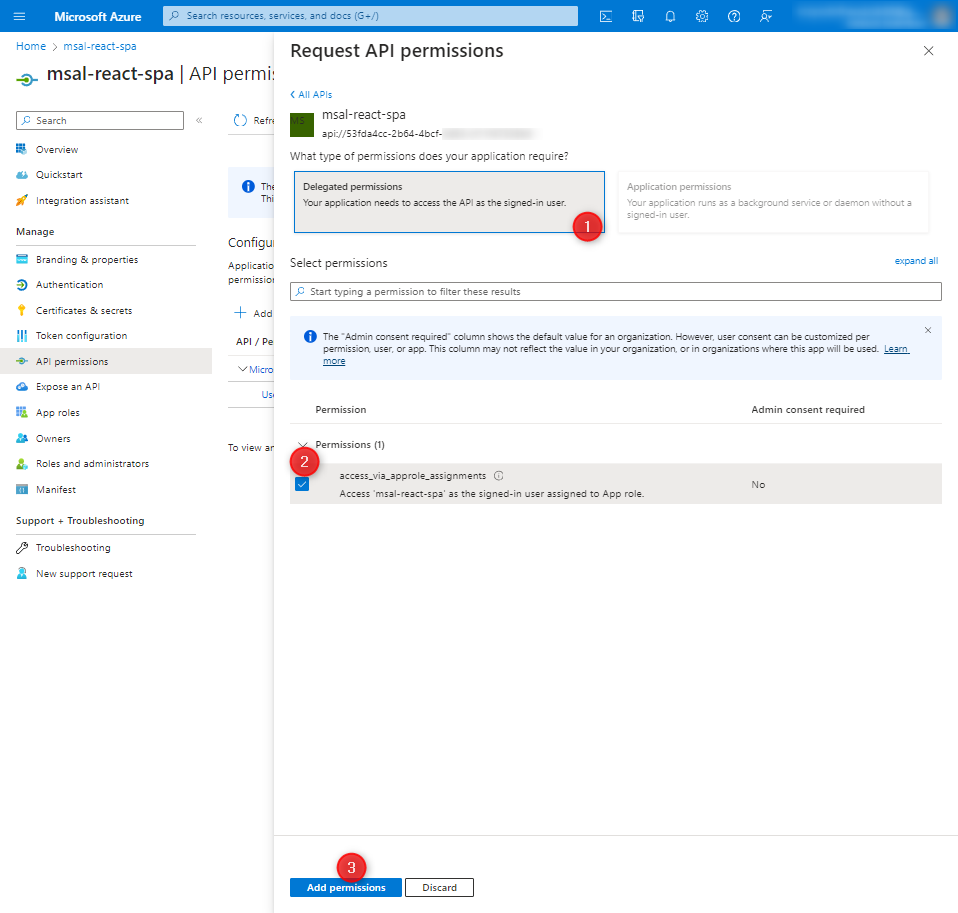
In the API permissions tab, we add a permission.
Attention here! The tutorial suggests searching for APIs under the My APIs tab, but currently, due to changes in Azure, it is likely located in the tab as shown in the screenshot below:
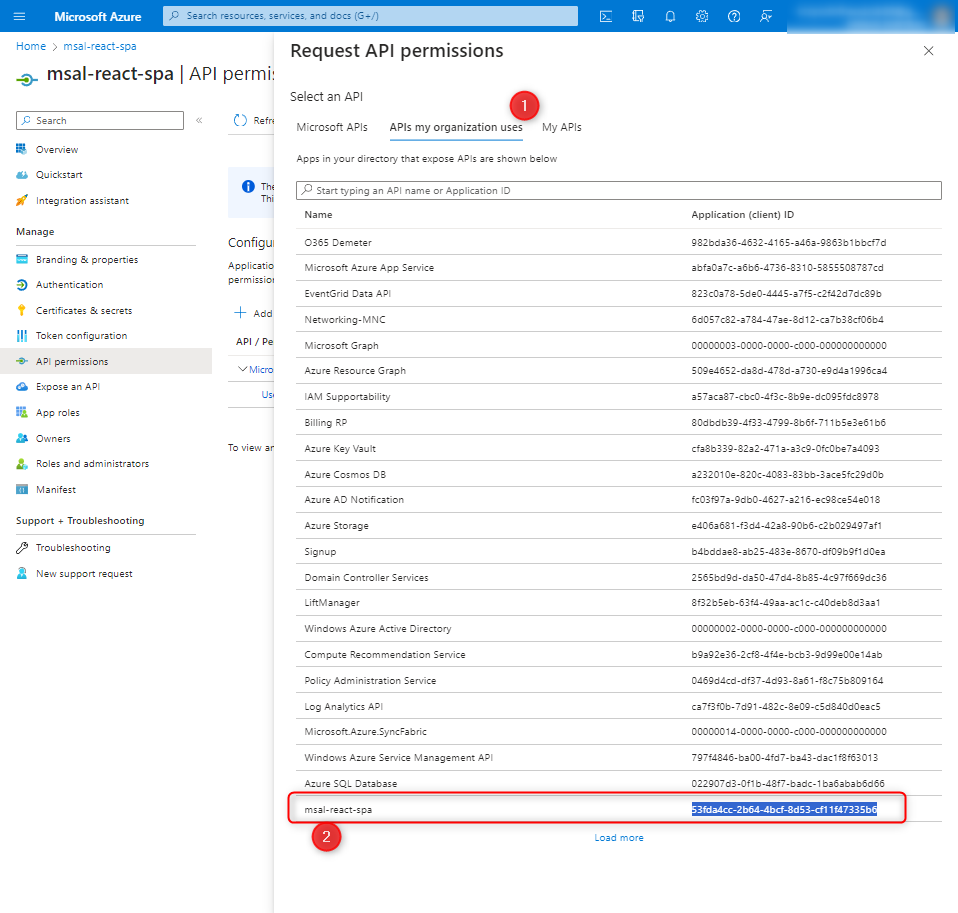
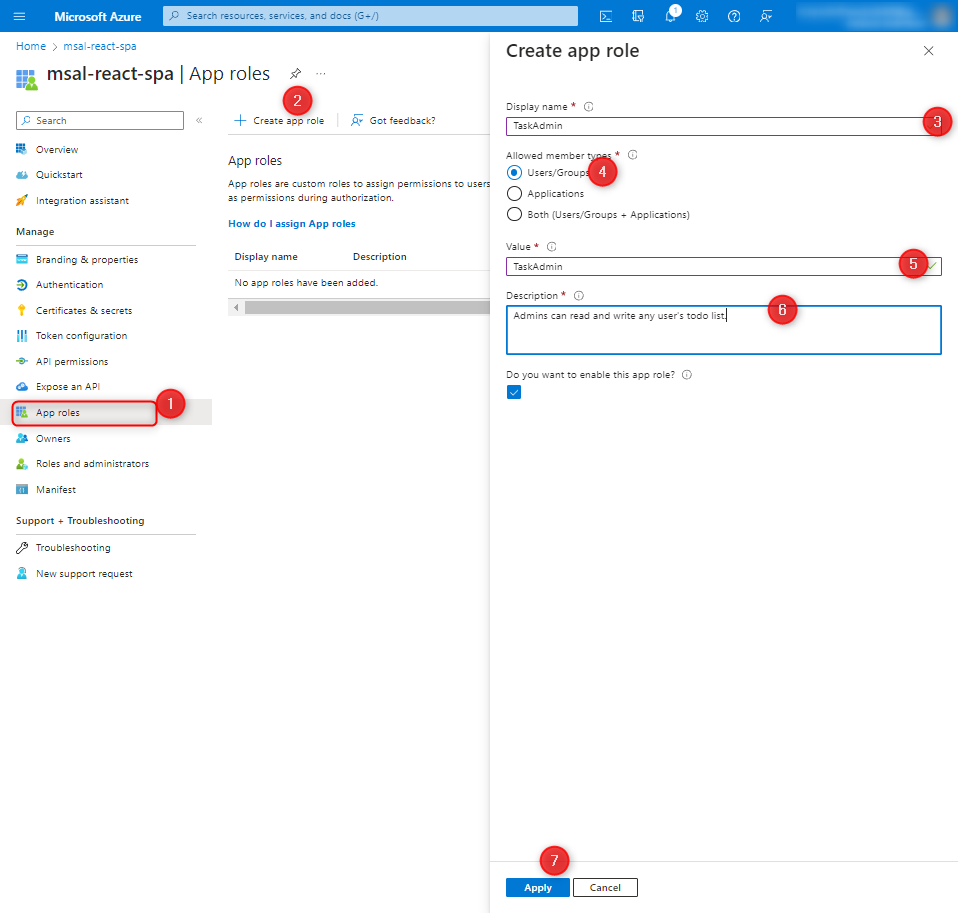
We add a role that will later be transmitted to the application inside a claim.
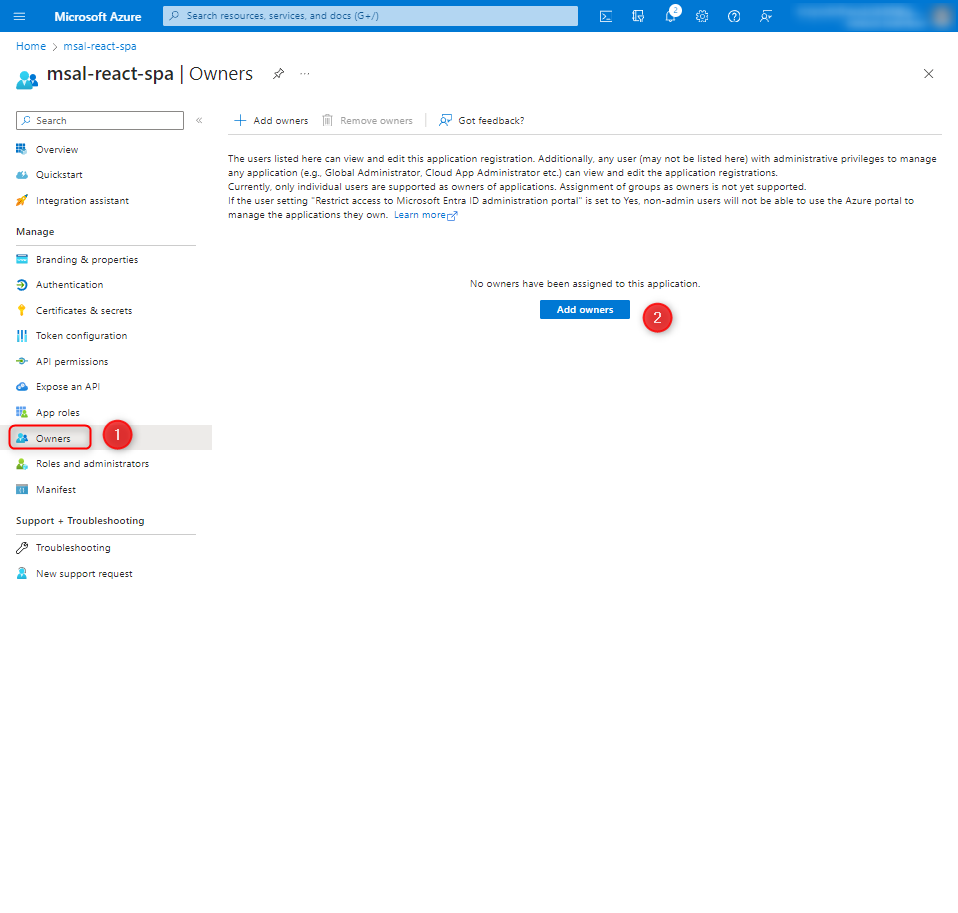
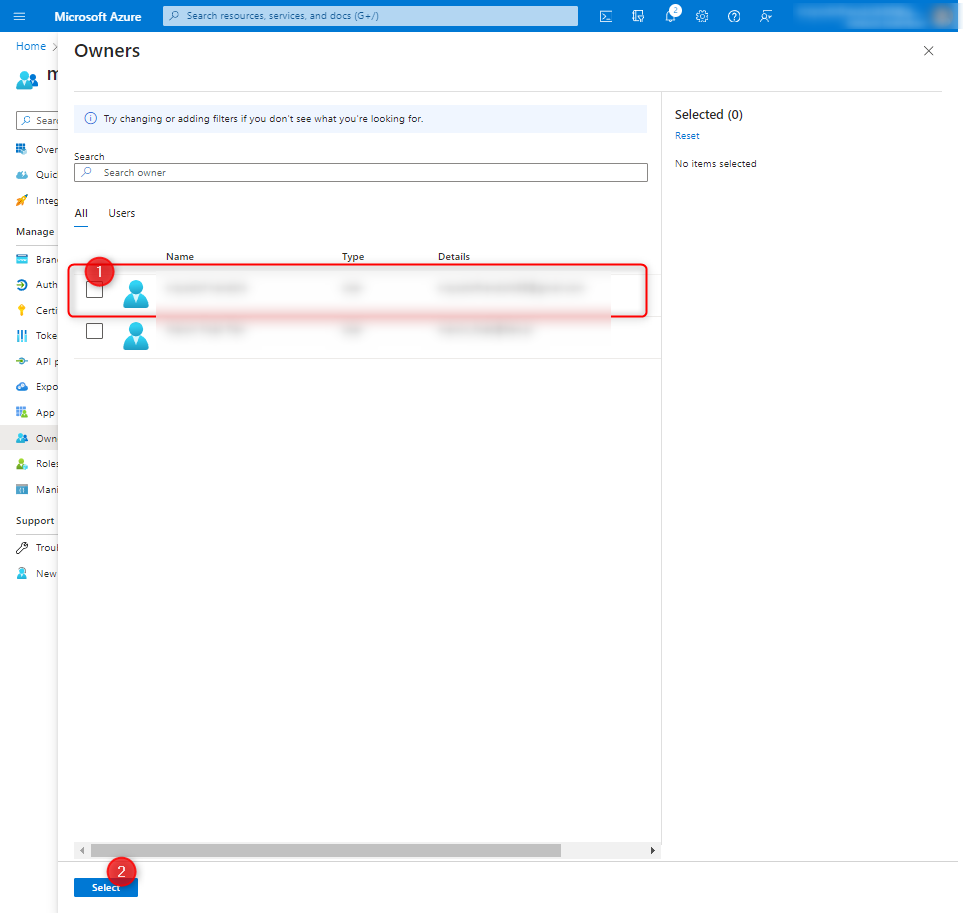
It is also necessary to set the owner of the application.
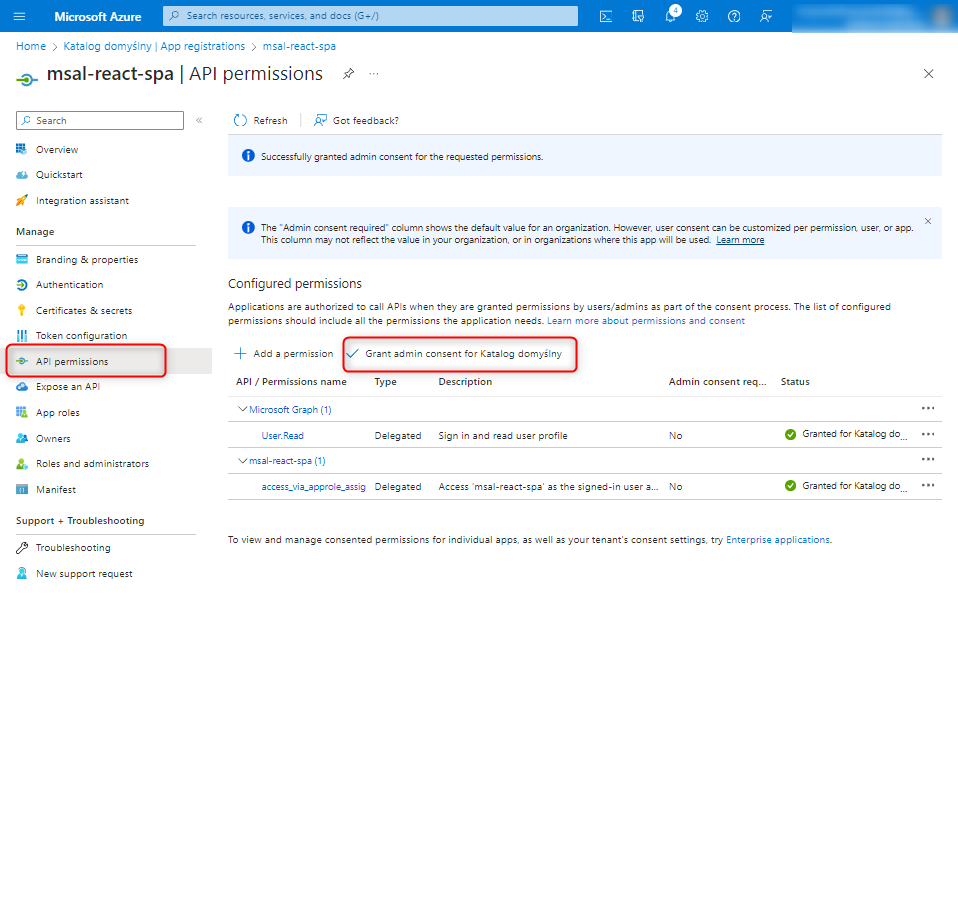
Now, in the API permissions tab, click on 'Grant admin consent’.
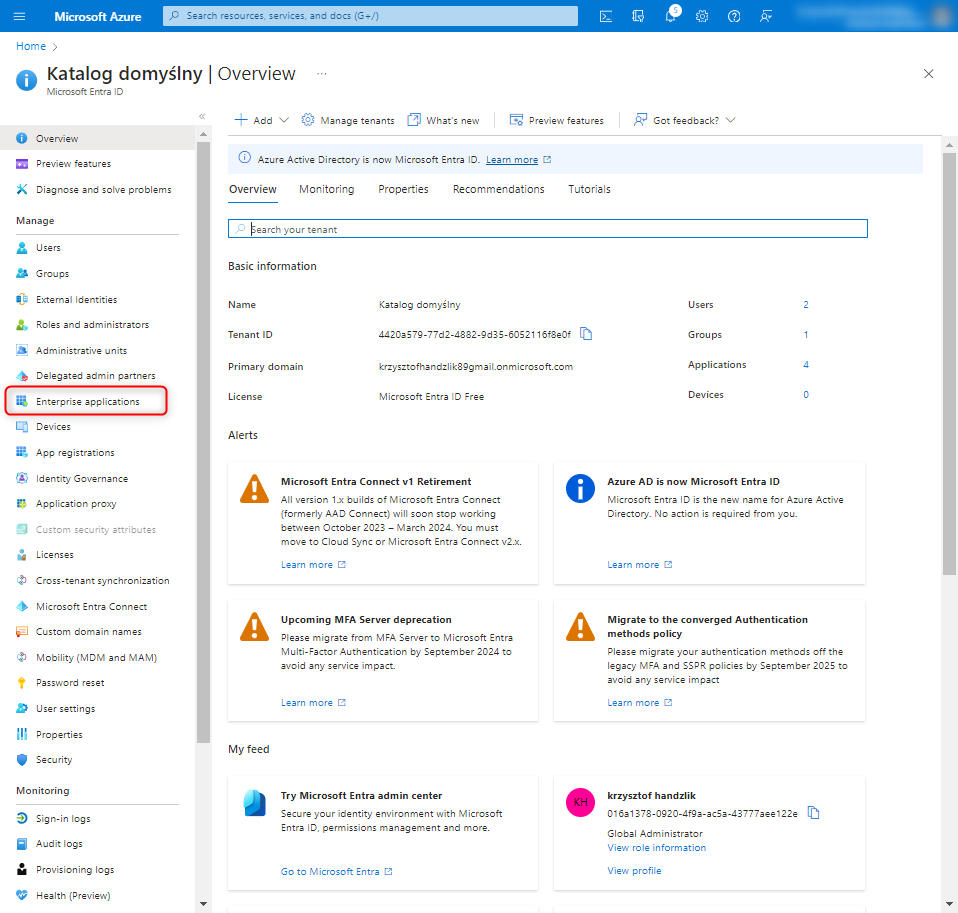
At this point, we go one level up to the Microsoft Entra configuration and move to the Enterprise applications tab to assign the newly created roles to specific users.
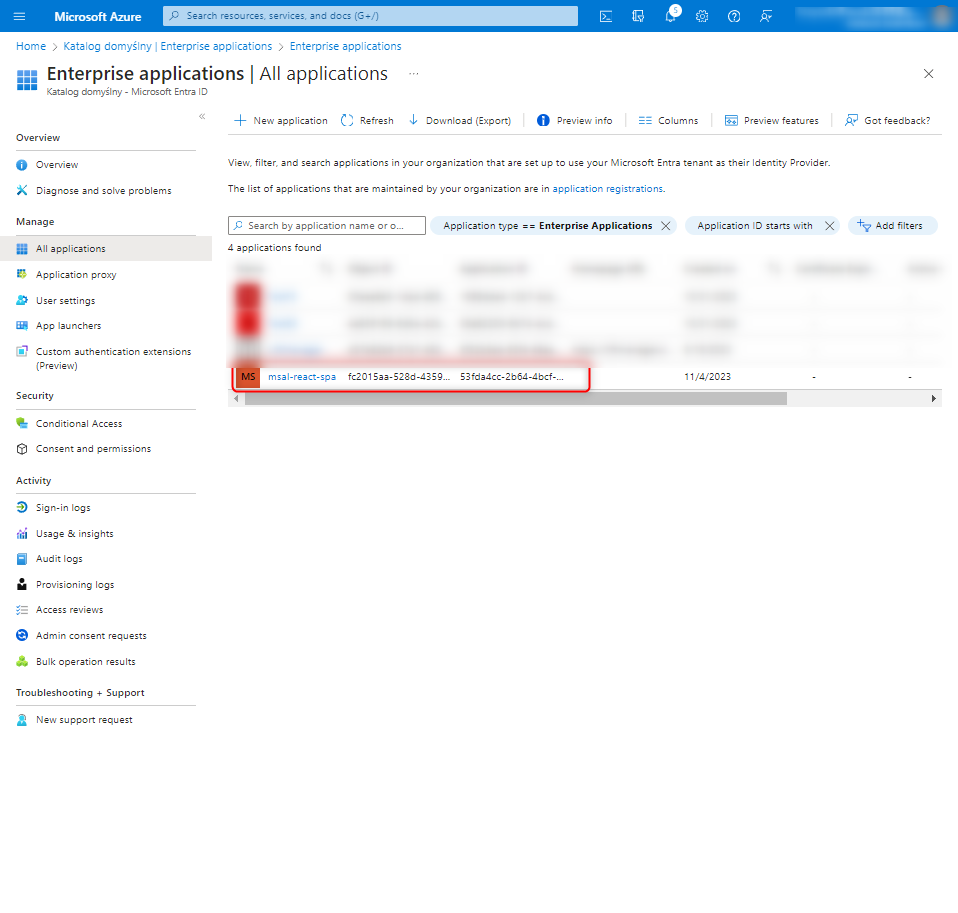
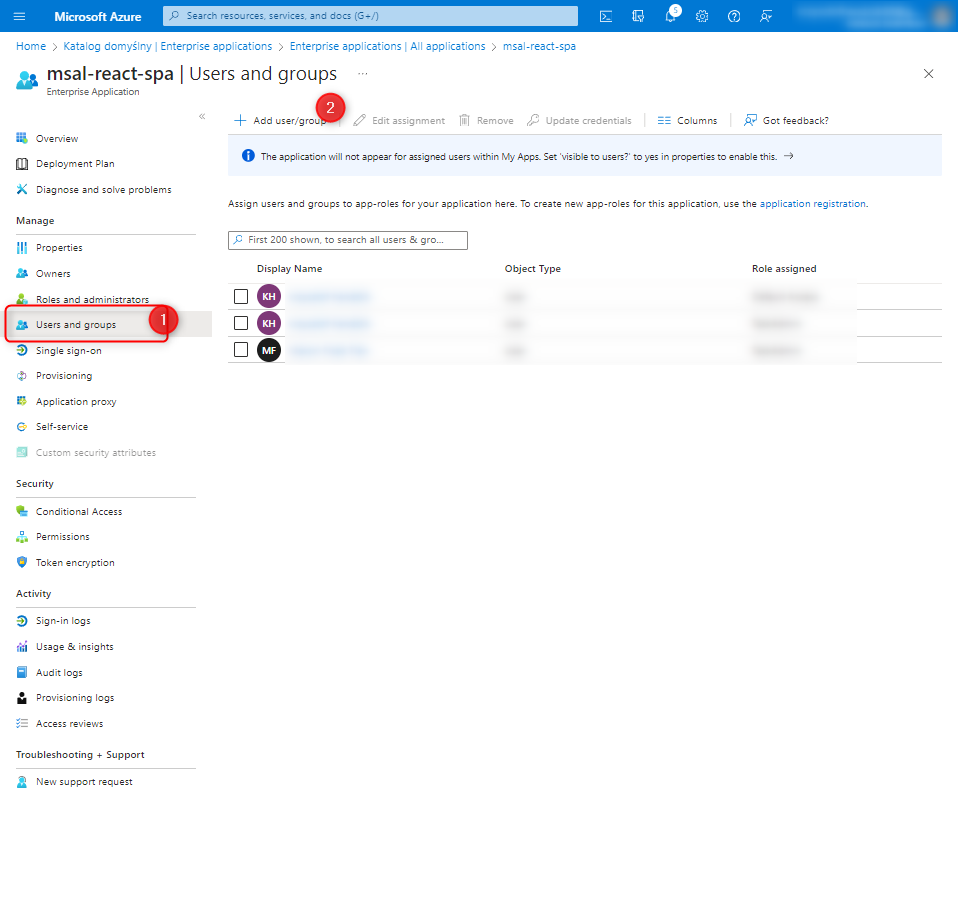
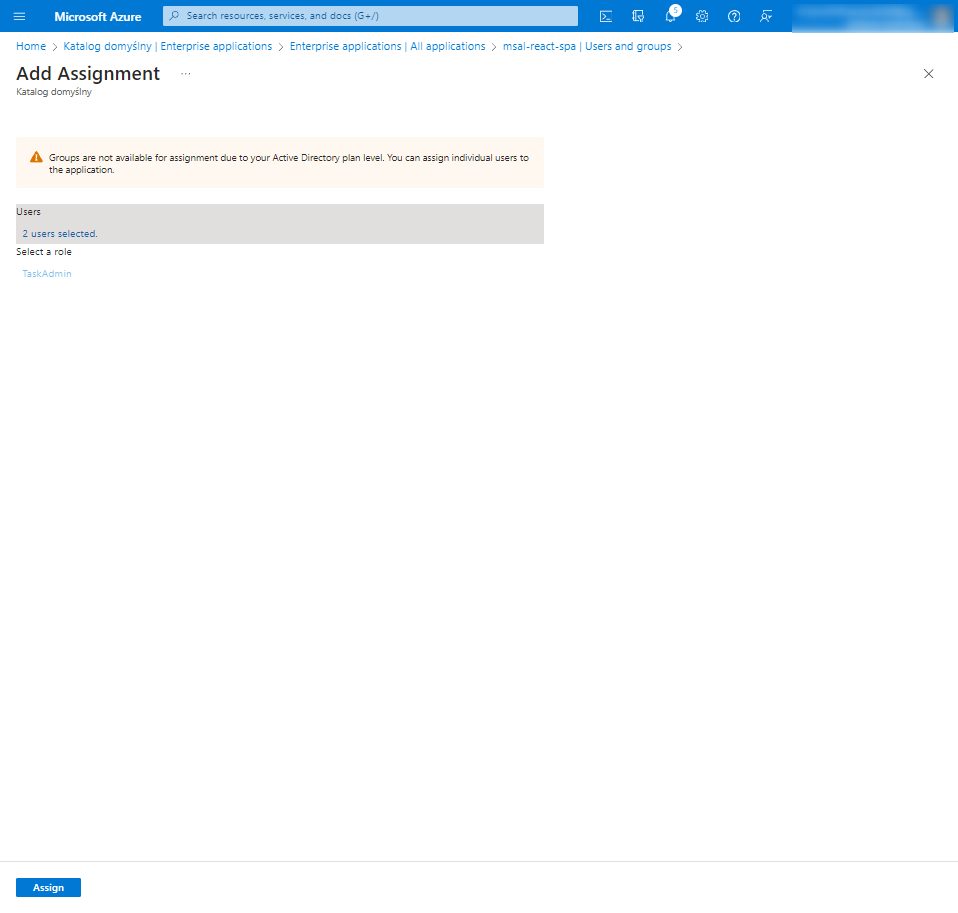
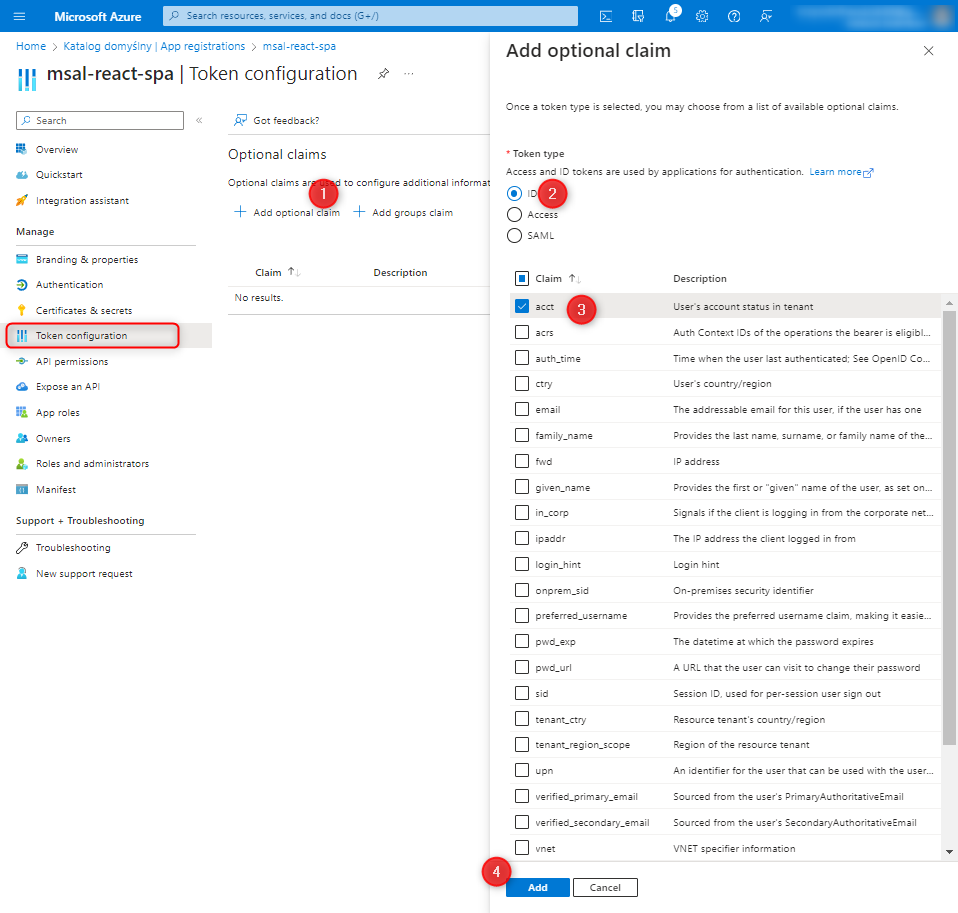
After correctly assigning roles to users, we return to App registration and move to the Token configuration tab, where we specify the options to be included in the token.
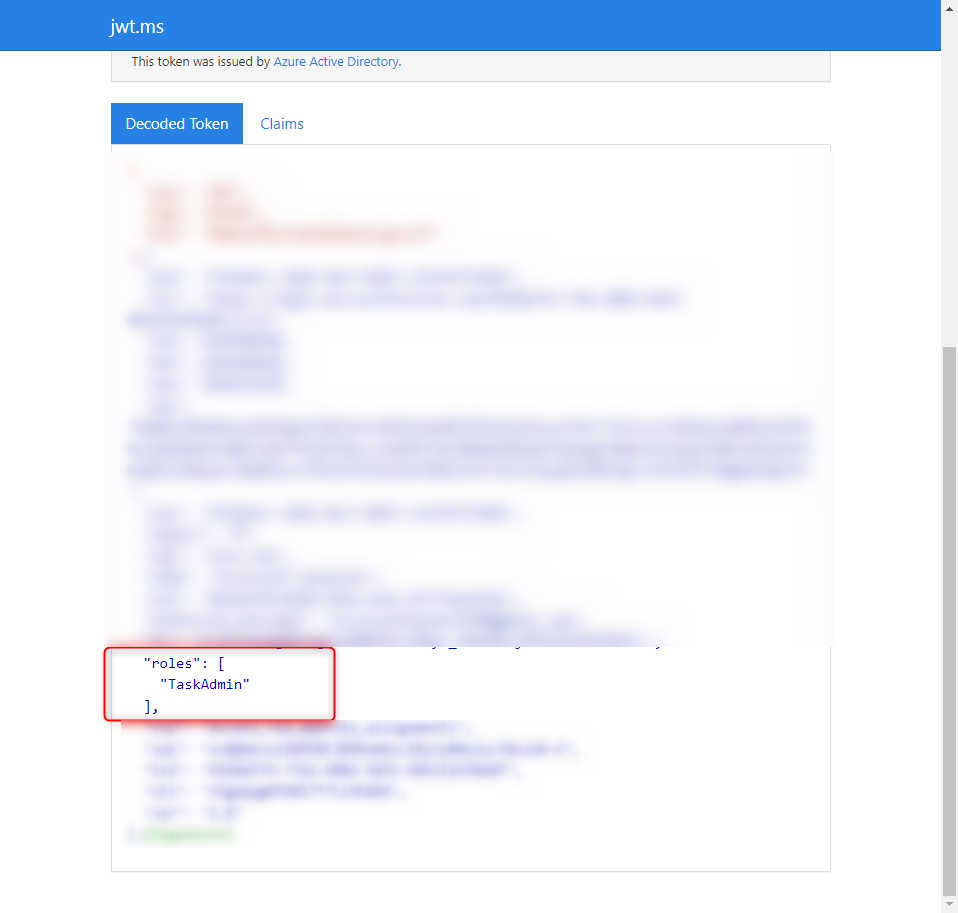
At this point, we need to launch the application to check if all the steps were correctly executed. We will address this topic in the next post. Here is the expected result in the token:
